 | ||||
| ||||
| ||||
| ||||
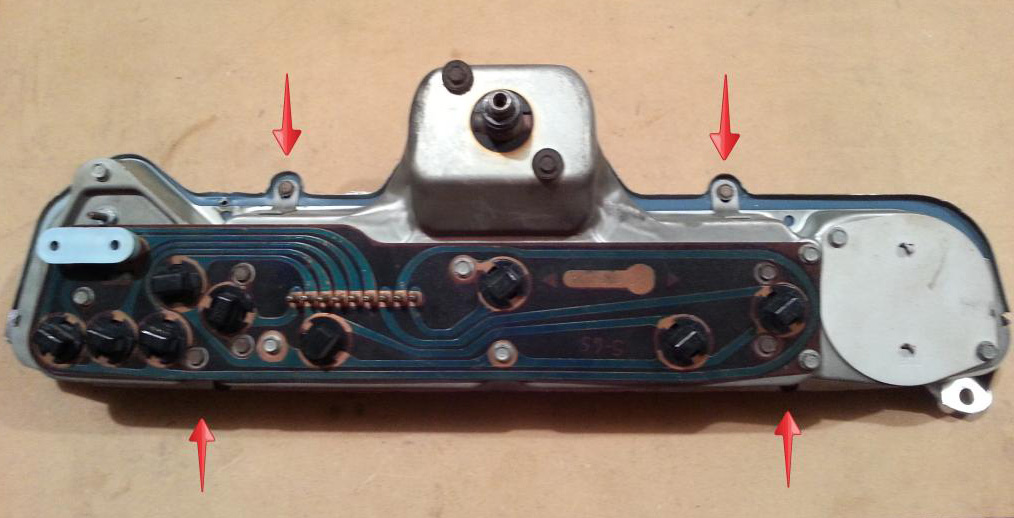
2. To get to the odometer I had to pull things apart, starting with these 4 screws:
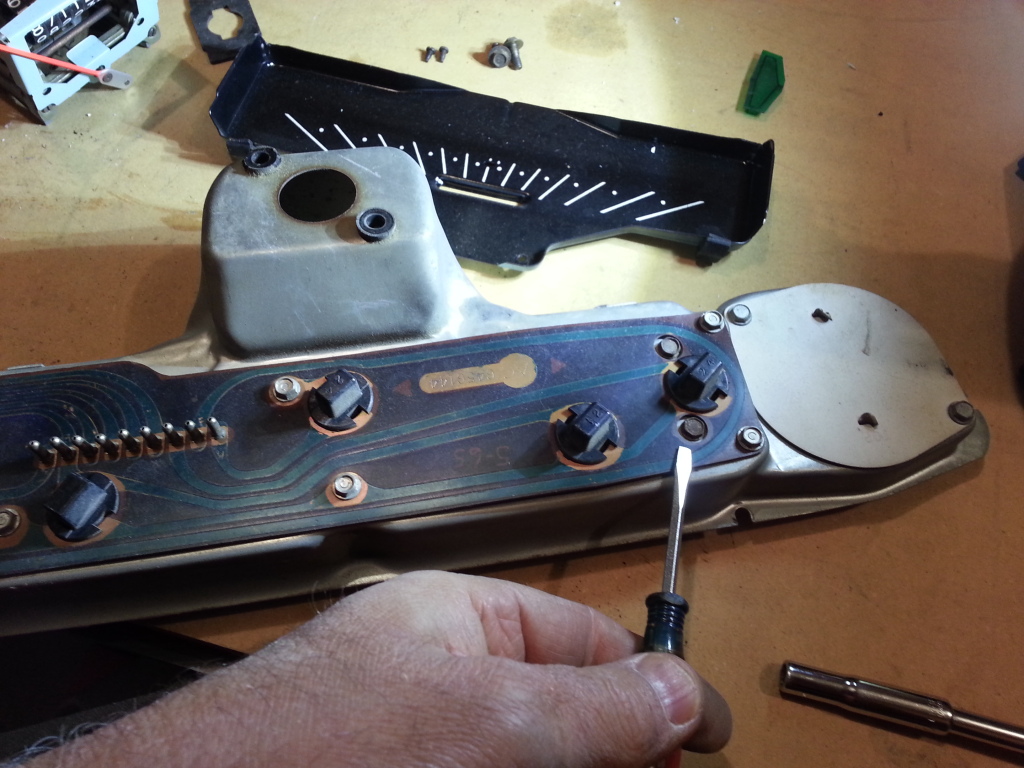
3. Next I removed this "blackout plate", which covers most of the internals of the cluster. Once you've disassembled the speedo to this point, the plate is only retained by a couple crimps at the bottom where the speedo cable attaches.

| ||||
| ||||
12
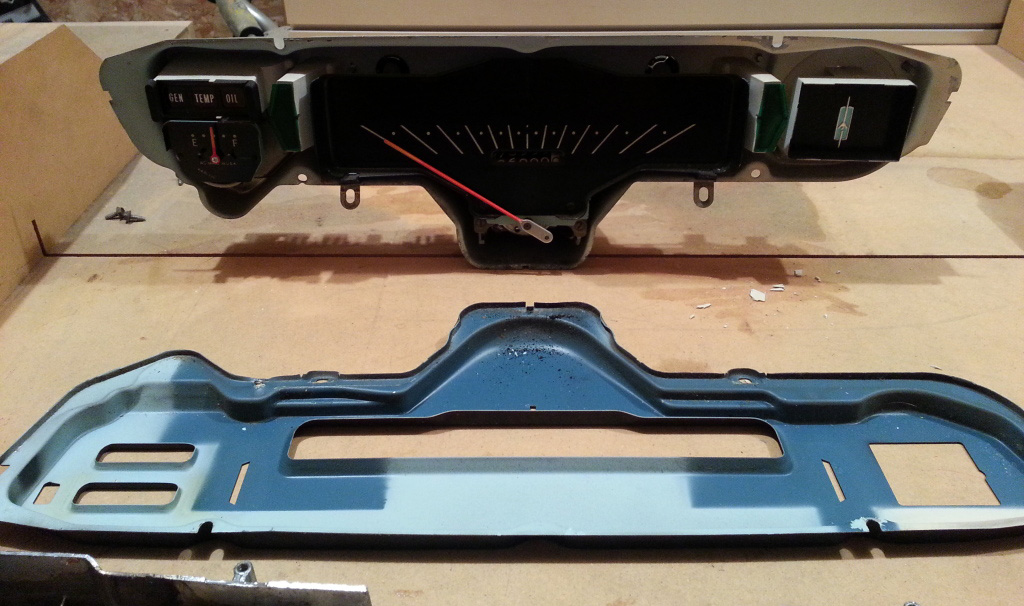
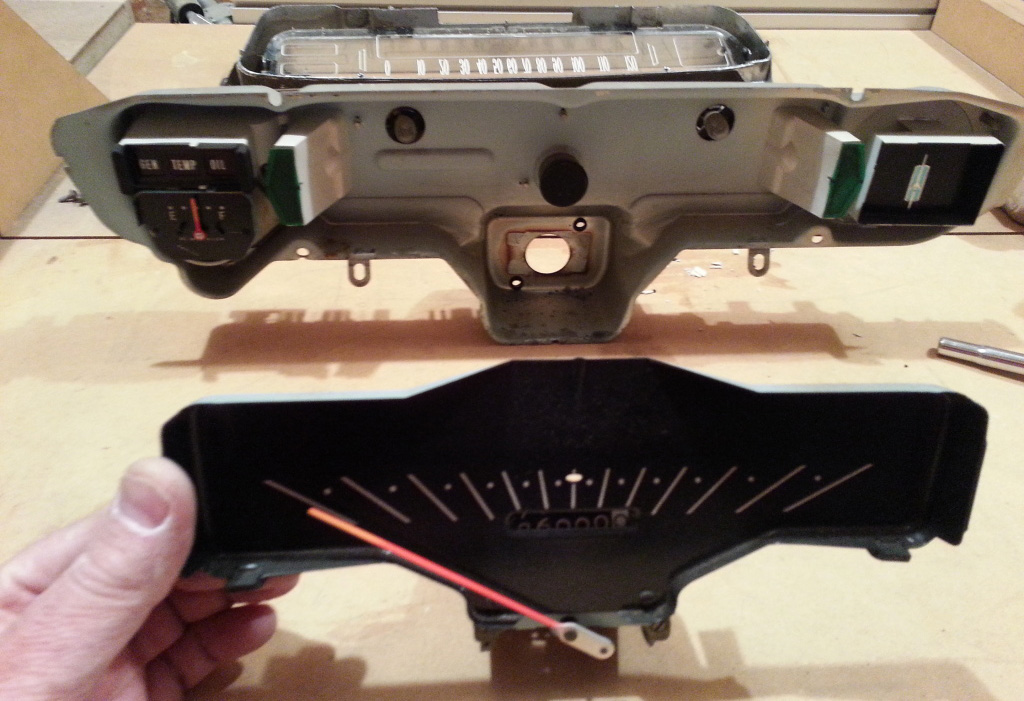
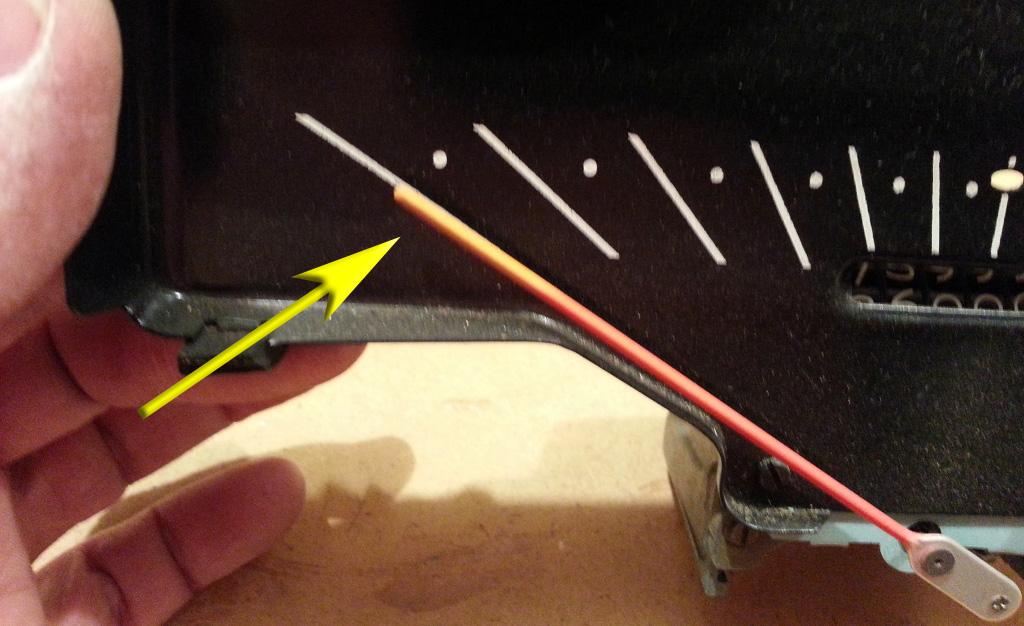
5. You can see where the needle has faded, and could use a repaint as explained on the "Resto Page"
5. With tumbler step depressed, pull lock button out slightly (one click).
| ||||
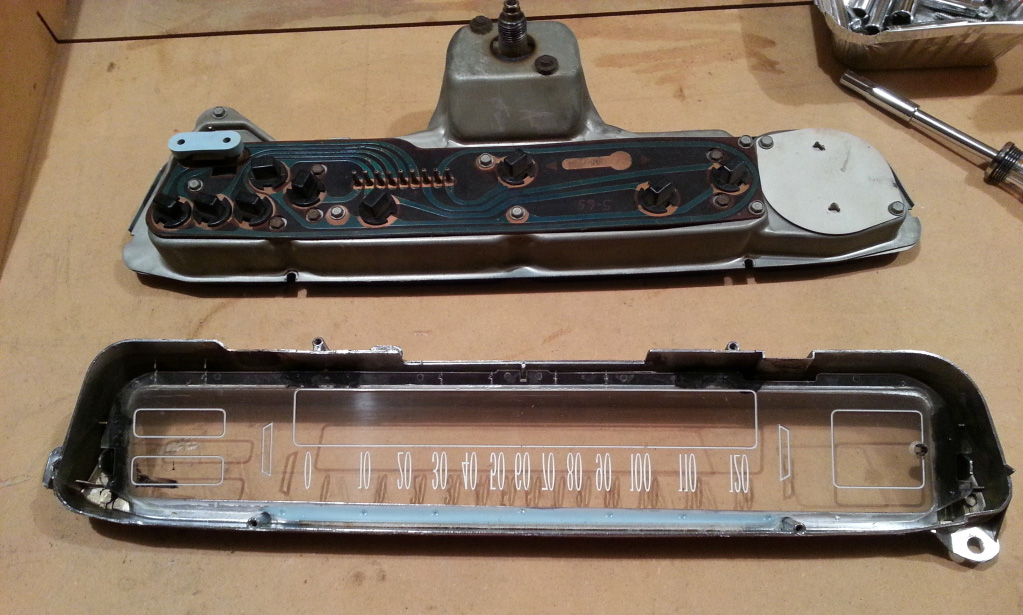
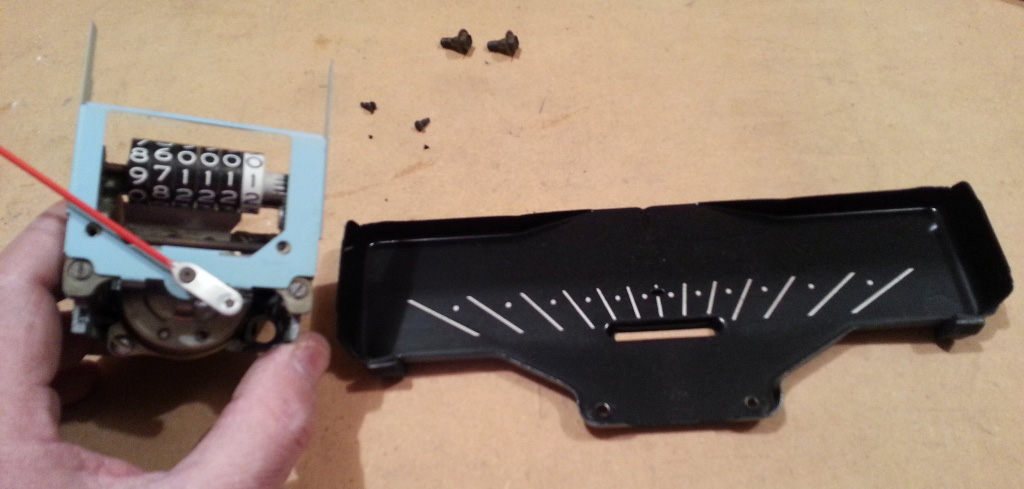
6. Two small screws hold the black "5mph" increment marking plate to the speedo unit.
9. The numbers were locked up... and I used a small flat blade screwdriver to free up the gearing, and everything loosened up. I put a square-bit in my drill, and spun the speedo input, and put 1.4 miles on the odometer, and the needle was smooth.
It's all pretty clean inside, so I've held off putting any grease or spray lube on anything. Seems like that would encourage the accumulation of dirt/debris, and it hasn't had any for the prior 48 years.
So I need to clean the whole assembly then repaint the needles on the speedo and the fuel gauge,
Have you ever wondered how to break down your speedometer cluster.
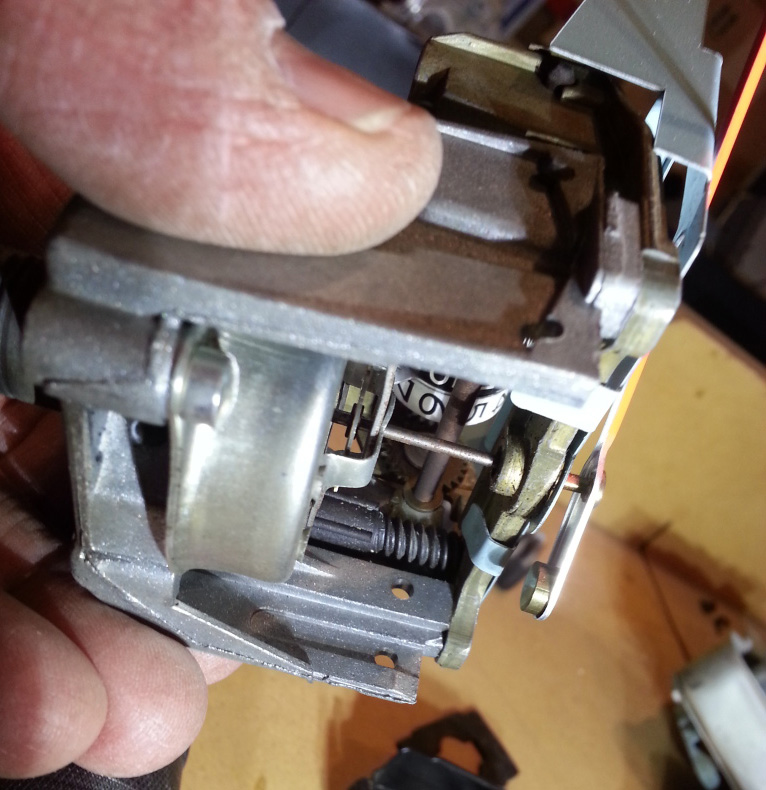
1. Rear view of gauge cluster (inverted).
4. Then you can remove the speedo unit itself, by removing the two screws that attach the speedo to the gauge cluster housing. The are located on the back, next to where the speedo cable attaches.
7. And there's the core of the speedometer.


| ||||
| ||||
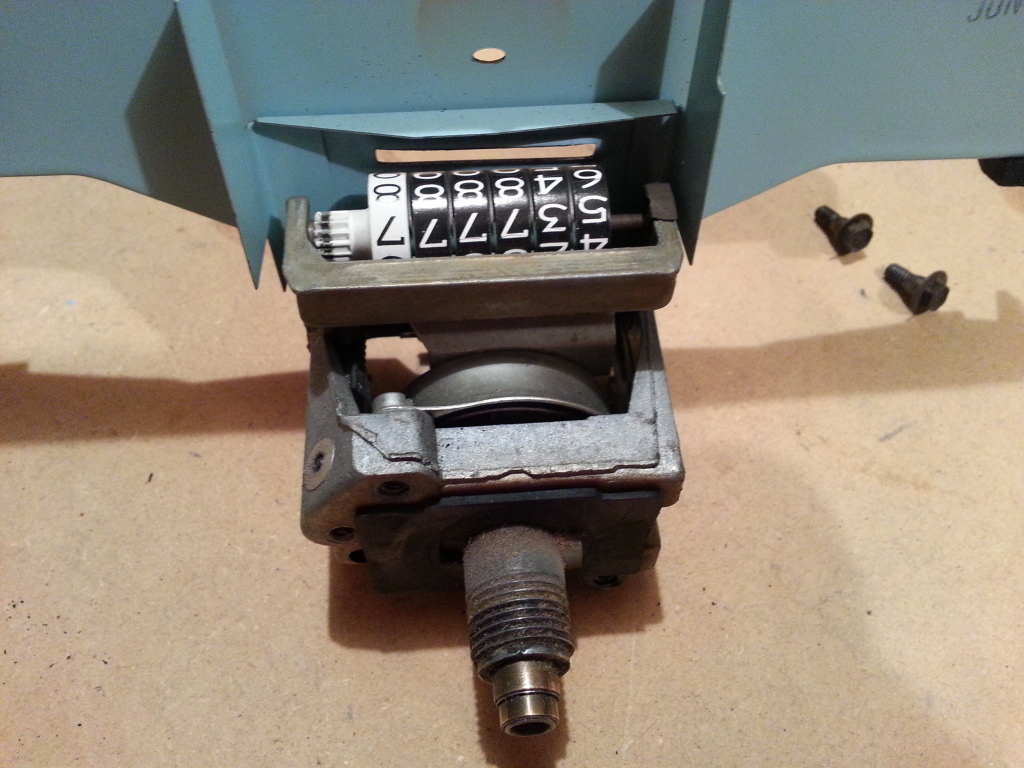
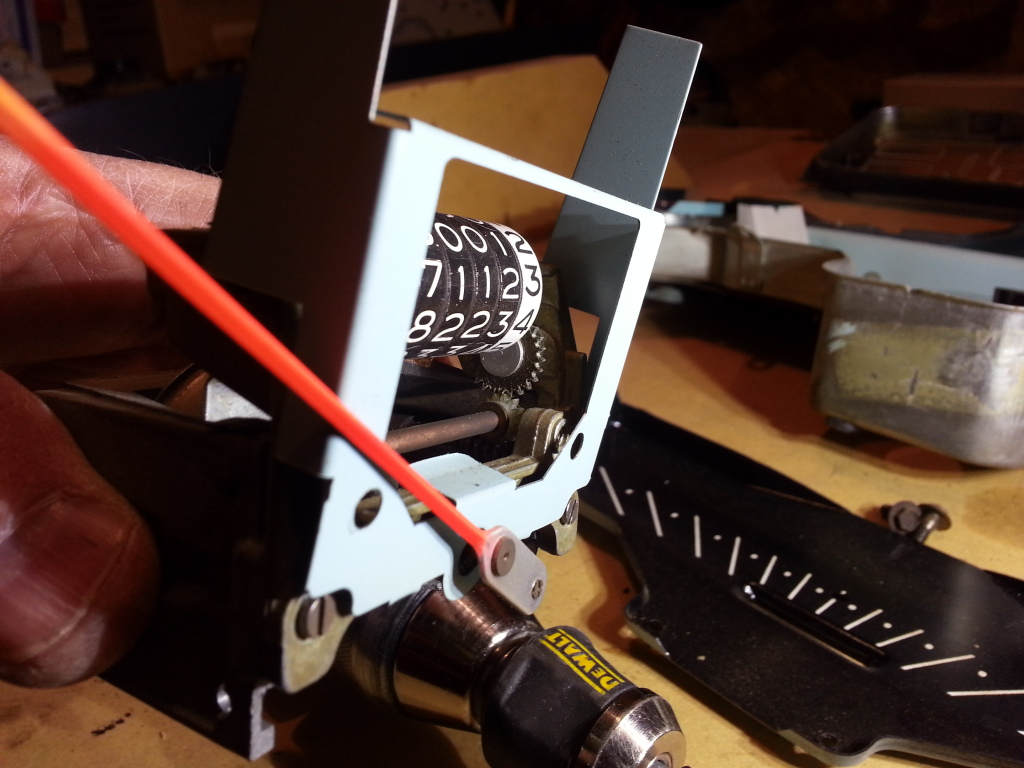
8. You can see some of the gearing that turns the odometer digits...
| ||||
| ||||
Thanks To: Steve Knight "Mongoose"
.